Tuesday, May 31, 2016
Monday, May 23, 2016
Friday Post May 20
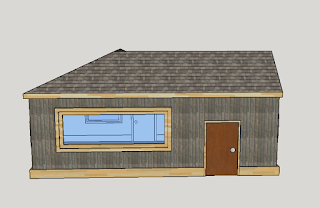
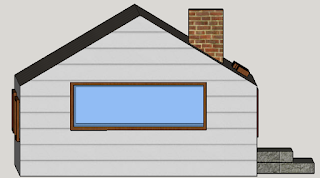
Link to Sketchup: http://www.sketchup.com/
To use:
1. Click the big red download button
2. Double click the Sketchup.msi file
3. Allow the installation wizard to guide you through the installation
Now to explain 4 tools.
Tool #1: Push/Pull
To use this, select a face of the object, click and drag. You can also enter a dimension on your keyboard, i.e. 40" for exact measurements.
Tool #2: Measuring tape
You use the measuring tape to create guides for shapes.
Really, you use it in the same way as the push/pull tool, except you select an edge instead of a face. Again, you can enter in a dimension on your keyboard.
Tool #3: Rectangle tool
Use this to create a rectangle, which you can modify with the push/pull tool
You click and drag to use it. You can also enter in a set of dimensions, in the format of 40cm,30cm
Tool #4: Offset tool
Use this to create an offset rectangle, which counts as a seperate "Face"
Use it the same as everything else, click and drag inwards or outwards, enter in a dimension.
Thursday, May 19, 2016
Thursday, May 12, 2016
Tuesday, May 10, 2016
Tuesday, May 3, 2016
GJ - Day 2 - Preview
Hello, today I will be explaining how to set up a colony in Planetbase.
I would probably recommend setting up a medium solar panel, a medium wind turbine, a small power generator, and a Water Extractor. Then, build an Oxygen Generator and an Airlock. This will allow your colonists to breathe. After that, connect a small Canteen to the Generator, and place a 4 person table, a drinking fountain, and a meal machine. After all that, build a Biodome and connect it to the Canteen. In the Biodome, place one starchy plant, two vegetables, and a medicine plant. These will become important later. At this point, your colonists are probably tired. Build a dorm and put 4 bunk beds in it to allow all of your colonists to sleep. Now, build a Lab and place two Tissue Synthesizers and one Workshop. Change one of the Tissue Synthesizers to produce either Beef or Pork so that your colonists do not die of malnutrition.
I would do things differently than the tutorial, which tells you to place an oxygen generator and an airlock first. This is a bad idea.
Everything died when a meteor hit my oxygen generator and I didn't have the resources to repair it before everybody asphyxiated. If I were to do this again, I would focus on getting resource production and processing up and running as the first priority after my colonist's basic needs.
The screenshots are pictures of building all the various structures required to survive.
The screenshots are pictures of building all the various structures required to survive.
Subscribe to:
Comments (Atom)


